


How to open an account with FastComet this summer & get 80% OFF
Last updated on March 9, 2026
FastComet is one of the rising stars on web hosting. Its has 50,000+ customers from 70 Countries.
It has affordable pricing and great techincal support.
If you read our detailed review and you are concidering getting started with FastComet, this article will guide you step-by-step through the proccess, with screenshots. So lets get started.
For this FastComet tutorial we choose the cheapest plan of FastComet. Likewise you can choose the package that is more on your needs accordingly.
How to Create an Account with FastComet and get 80% OFF
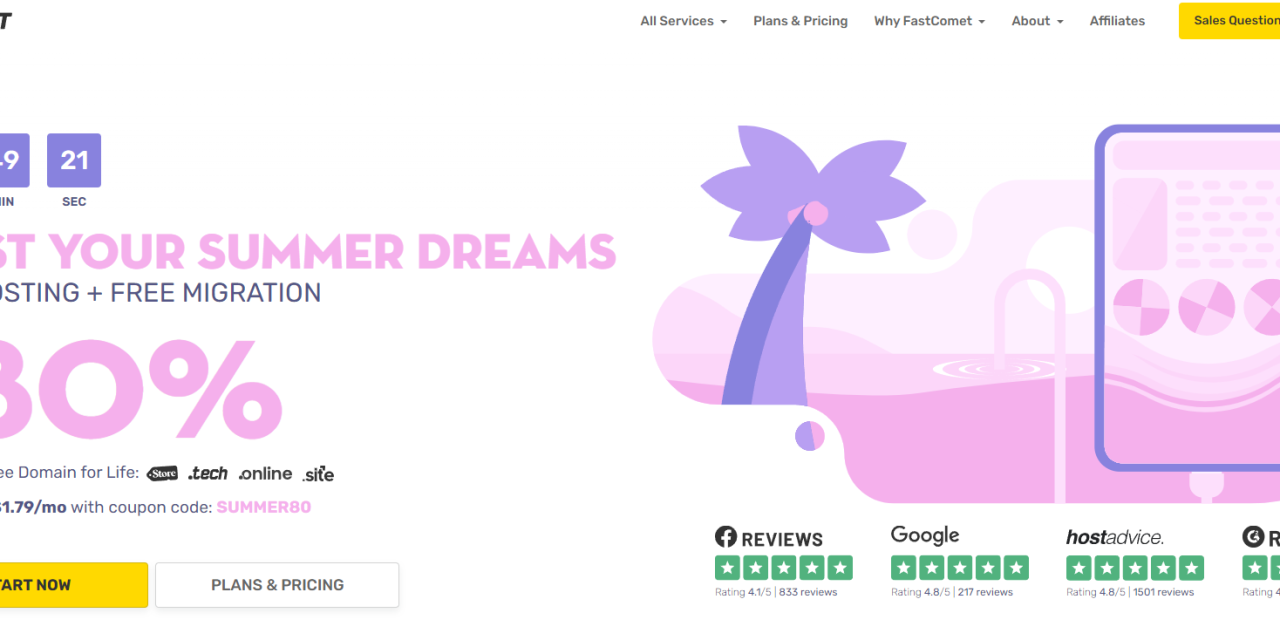
1) Firstly visit fastcomet.com
Click here to visit FastComet. As soon you are there click on the START NOW button.
How to get started on fastcomet
2) Choose your desired pricing plan
Click on START NOW button on a pricing plan based on your needs. For the case of this tutorial we choose the first package plan.
Related Posts:


3) Register a domain
On the next screen you can register a domain or choose I already have a domain if you already have.
Bear in mind that this is the url name of the website that users will type to visit your website.
You can choose .com or other TLDs (extensions) likewise .me .guru .net
When you find an available domain name then click USE THIS DOMAIN button.
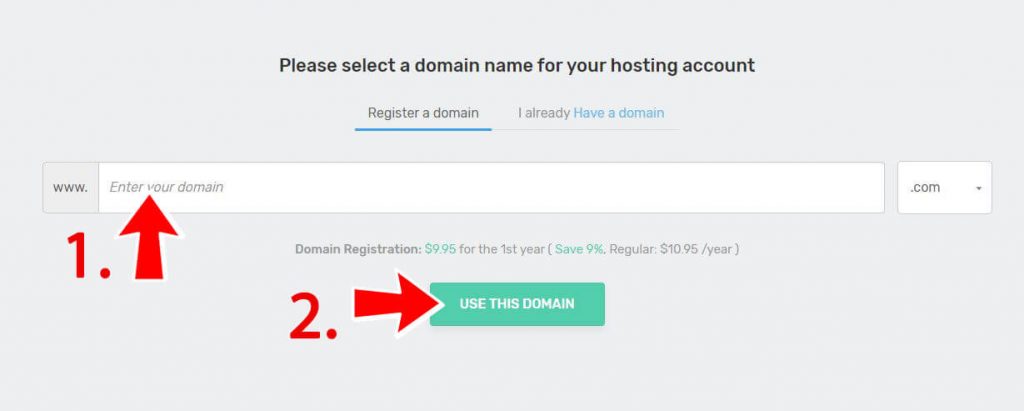
register a domain name with fastcomet
4) Account Information
Up next its the registration page, that you need to fill out, with your personal information.
Fill out the form with yout personal contact details.
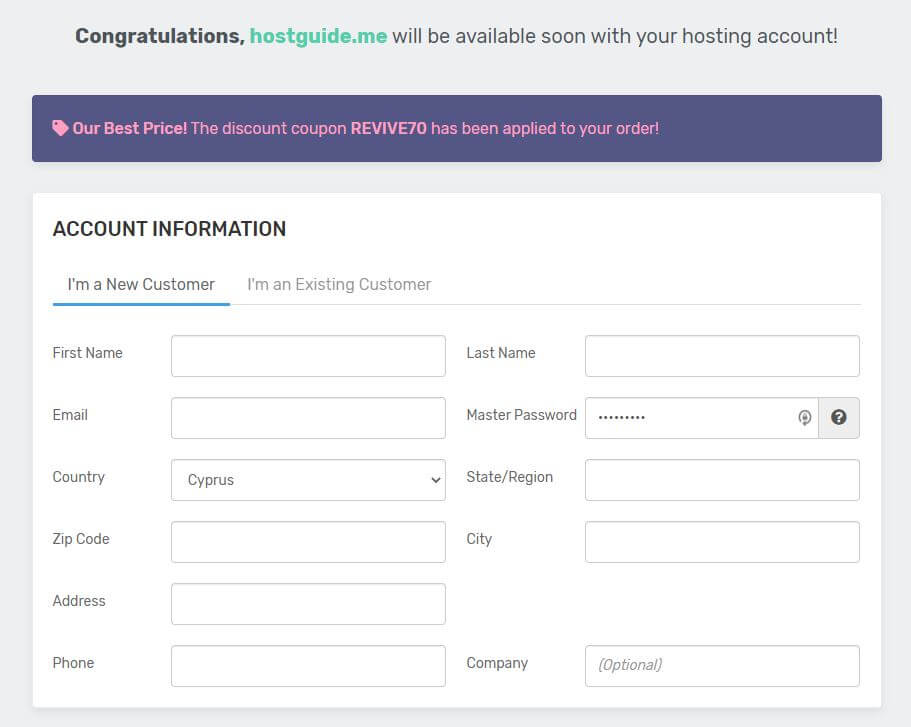
FastComet Registration Account Details
5) Product Information
Moving down is the product information section. On this section, you may just verify your fastcomet hosting service as it is, or choose othewise.
Hosting service
The most important option are
Plan
- Shared Hosting – FastCloud (the one we choose for this tutorial)
- Shared Hosting -FastCloud Plus
- Shared Hosting – FastCloud Extra
Datacenter Location
(Its better to choose the Nearest to you, or choose the nearest your users will be).
Period
You can choose prefered period. the default is 12 months. If you want to benefit a discount price longer, then you can choose longer period.
* The special initial price applies for the first invoice only. Once your initial term is over regular renewal prices apply.
- 1 month
- 12 months
- 24 months
- 36 months
Extras
Some optional extra you can choose is
- Search Engine Submission
- Search Engine Optimization (SEO) Audit
- Google SiteMap
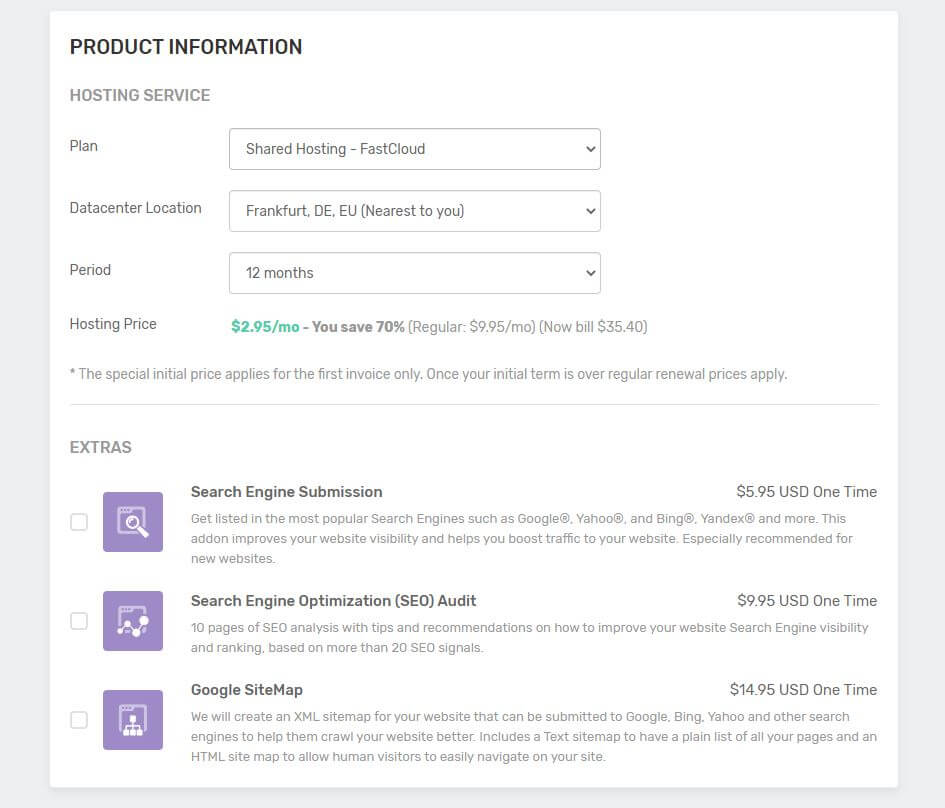
fastcomet hosting service information options
6) Payment Information
Scrolling at the end of the registration page its the payment information.
Available payments methods is
- Credit Card
- Paypal
You can add a promotion code if you have any and check the total payment.
Accept the Terms of Service and Privacy Policy and accept if you want to receive newsletter by FastComet.

FastComet Payment Information
7) Complete Order
Lastly click on COMPLETE ORDER.
Thats it, you will now receive a confirmation email and you will redirected to your client panel.
Summarize
On FastComet with just $1.79,mo you can host your website. The steps we believe are simple and straight forward.
From there and on, you can install your favorite application, like WordPress, Magento or any other popular platforms.
Let us know your thoughts about this host guide.
Thank you for reading our article, how to open an account with FastComet.


I opened the account and also had a discount, just in a matter of minutes.
Thanks Christos